Once an animation has been created in the Animator, it can be exported as a
Tableau extension if required. The extension may be a non data-driven
animation or if variables have been included then the Tableau extension can
be used to set those variable values. This allows the creation of animated
charts, indicators and Infographics. In Tableau, data-driven animations make
use of the values in a worksheet and are updated when a filter and/or
parameter is changed. Extensions can be either Networked or Sandboxed. To
create a Sandbox extension, a couple of additional actions are required and
this will be described in this section. Opening the Tableau Extension Form
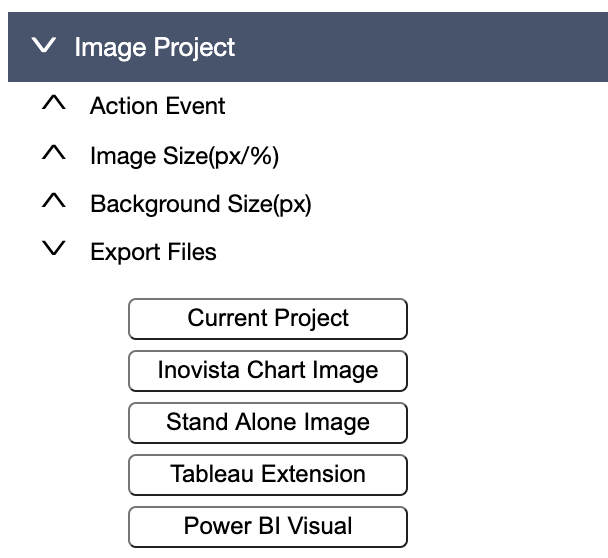
Once the animation is ready, go to the 'Image Project' -> 'Export Files'
section. Click on the 'Tableau Extension' button.
This will open the Tableau Extension form.
The form has 2 tabs, one is 'Required' which must be completed in
order to create an extension and 'Optional'. If the animation contains
variables which will be used in the extension to map data in Tableau, then
the Optional tab allows the entry of a description of each of the
variables. These descriptions will be shown as tooltips in the Tableau
extension editor popup.
Required Tab
As the name suggests, all values in the required tab must be completed
correctly.
Extension Id: This must follow the reverse domain name
pattern e.g. com.example.extension as a base with the actual id as the
last value, e.g. com.example.extension.MyExtension - the last item may
be capitalized but the preceding ones must be lower case.
Version: A version number e.g. 1.0 or 0.9
Title: The name of the extension
Author: The name of the extension author
Author Email: The email address of the extension author or
company
Author Organization: The name of the organization that
created the extension
Organization Website: The website of the organization, N.B.
this must begin with 'https'
Extension URL: Specifies the scheme (https), the name of the
server, the port (optional) and the path to the extension. Pay attention
to entering the correct path location as errors here can be difficult to
debug. If this is a sandboxed extension, make sure that the full path
belongs to the sandboxed section on the server.
Icon: Use the 'Select Icon' button to load an icon that will
be used in the extension, both in the editor popup and the 'About'
dialog. The image size should be 70px X 70px.
Default Locale: The default locale of the extension.
Sandbox the Extension: Check this to create a Sandboxed
extension. Note that the library and css files will need to be located
within the extension and that the 'Extension URL' must be in a server
sandbox.
Define Data and Properties
Scroll down the form to view the list of values defined as variables in the
animation. Variables can be setup as either 'Data' or 'Properties'. A 'Data'
value will link to a Tableau data source. A 'Property' value will be
available in extension edit section, a user will be able to directly select
a specific value rather than linking to data.
If the 'Property' option is selected, the 'edit' button becomes available.
Clicking on the 'edit' button will present a dialog box which will help to
define how the property is presented in the Tableau Extension popup.
The initial editable options are:
Title: The name that will be used to define the property.
Default Value: The intitial default value of the property.
Property Type: A list of options which will define how the
user will be able to edit the property in Tableau.
The Property Type options are:
Boolean: A true/false or yes/no property.
Text: The user will be able to enter a textual value for the
property.
Numeric: The user will be able to enter a numeric value for
the property. Additionally, there is an option to set a minimum and/or
maximum value.
Color: The Power BI color editor will be used to set the
property.
List: A list of values can be entered here. In Power BI, the
user will be able to select from one of those values.
Font Size: The Power BI font size editor will be used to set
the property.
Font Family: The Power BI font family editor will be used to
set the property.
Optional Tab
If variables have been added to the animation, they can be given a
description in the 'Optional Tab'. If a description has been entered, they
will be used in a tooltip in the Tableau editor popup to help a user
understand exactly what the variable represents. If left blank, then they
are ignored in Tableau and the 'i' icon will not be shown for any variable
that has no description.
Saving and Downloading the Extension
Once the form has been completed satisfactorily, click on the 'Create
Extension' button at the bottom of the Tableau Extension form. This will
close the popup dialog and create a download link in the Export Files
section. Click on the 'zip' file link to download it. This will contain
the newly generated extension.
Downloading the Libraries
The extension will also need the javascript libraries and css files. For
networked extensions, this download can be shared across as many
extensions as are available. For sandboxed extensions, they must be in a
sub-folder of the extension. The download link for these files is at the
bottom of the Tableau Extension form that was shown above.
They can also be downloaded from this link:
Library Files
Repeating Images
If there are repeating images in the animation, for example a number of
images presenting the same information for different entities, repeat the
variable name for each entity rather than giving it a new name for each one.
If this is the case, when the extension data is mapped in Tableau, then only
one item will be shown for each set. (in the example below, only one
'scalex', one 'scaley' and one 'docValue' will be shown in the popup. If the
Tableau data is in rows, then the first row will populate the first
variable, the second row will populate the second variable and so on.
Resizing Images
To ensure the images resize in Tableau, set the Image Size to a percentage
value in the 'Image Project' section.
Deploy on the Server
Extracting the zip file should present a structure as shown below. The base
name of the files will be the same as the end part of the 'Extension URL'
entered above in the Tableau Extension form. Note that the file with the
'.trex' suffix (in this case 'cityCost.trex') must also be copied to a
location where the user can access it to create the extension.
Place the unzipped files in the correct location on the server that will
supply the extension. Include the main directory i.e citycost. The zip file
is shown here only for convenience and is not necessary.
Next the css and javascript libraries downloaded above need to be added.
Once unzipped, the download contains two folders, 'css' and 'lib'. For a sandboxed
extension, place these folders next to the images and scripts.
For sandboxed extensions, the sandbox-config.json file will
either need to be created or edited. For more information, see the Tableau
Documentation.The
For a networked extension, place these folders in the
folder parallel to the root. Note that if there are multiple extensions,
these folders only need to be added one time. They can be shared among all
the extensions.